Additionally, there are tips on creating the tangle on my blog as well. If you’re not up-to-speed on how to do this cool tangle, be sure to click here for the original “Zentangle: B’Twined a new tangle” article or click here for the “Zentangle: B’Twined Tips and Tricks” article or Read More to see the various ideas and get the good stuff in this blog post!
Zentangle: B’Twined Tips
Be sure to see the overview and step-outs for the B’Twined pattern before reading on…
Here are some Zentangle B’Twined Tips that you may find useful. Most people commenting on the B’Twined tangle say they love it. When creating a piece of art using B’Twined, it is easy to get into the ‘flow’ of the pattern while focusing on the stroke being drawn. To me, this is the Zen of Zentangle. [Read more…]
ZenCube – A Zentangle Art Project
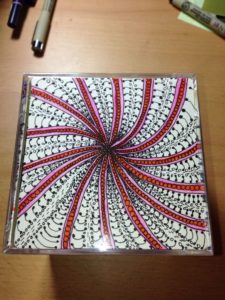
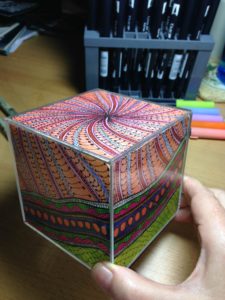
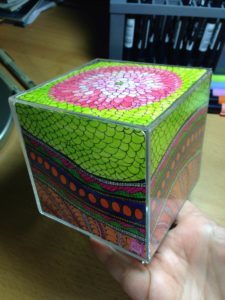
When I saw the 3.5 inch photo cube, I got excited! What a perfect item for what I will call a ‘ZenCube’. It’s been 6 months or more since creating it, and my skills have improved substantially, but I think it is worth sharing now. I first shared it at CZT-14 in Providence, RI., where it seemed to be well received. How to make the Zentangle ZenCube 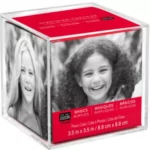 Purchase an acrylic 3.5” photo cube at Michaels in the framing department. I got it for about $4.00. I notice similar cubes online are much more expensive. Get 6 blank 3.5” square Zentangle tiles and number them on the back in pencil as shown in the photo below. I found numbering the tiles extremely helpful when drawing the string and tangling the tiles, especially when matching up how the top, bottom and sides interplay with each other. The numbering was also helpful when assembling the ZenCube. (By the way, T = Top, B = Bottom in the numbering scheme.) Be sure to retain the void-fill paperboard that comes in the cube, you will need it to hold the tiles in place.
 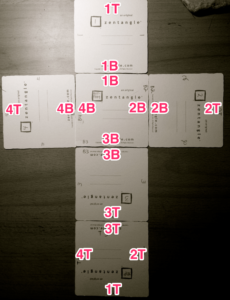 The next steps are to draw your strings, then tangles using the Zentangle Method, add coloring if desired, then and shading. In the photos below, I had colored the tiles before adding shading, using Tombow dual brush tip markers that I purchased from Amazon.com
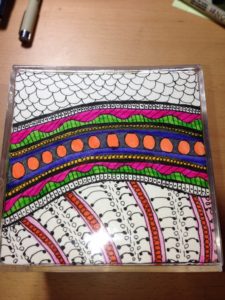
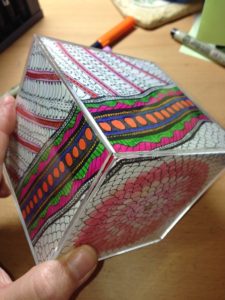
. The ZenCube can be used in many ways, for example, you might want to adorn it with a hand lettered poem. I spent a little time thinking about what I wanted; an undulating band that wrapped around the cube separating the top and bottom halves, with the border just tickling the top tile. So I laid out tiles 1-4 and drew the undulating stripe’s center band. making sure it had enough space for some pea size ‘pearls’. I made a few aura lines surrounding that initial band. Some solid, some with tangles, some narrow some wide. I ended up with 5 bands on each side of the pearled stripe. It will be fun to see what you come up with. I hope you find this idea helpful! Let me know how it goes by contacting me. Here are some photos of my first ZenCube while in the process of doing it…

What’s my favorite Zentangle website?
Well…you’re at it right now! But…really…you should check out Zentangle.com and Tangle Patterns.com, and of course there is the blog from the Diva with weekly challenges!